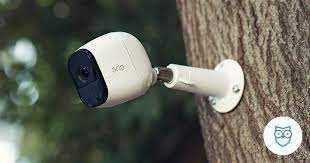
The Blink Mini camera and the Lorex security camera are best for home security surveillance. The Blink mini camera provides day and night security by monitoring all activities with its infrared night vision and zoom technology. It comes with a long-lasting battery life that can run for more than two years with its two AA lithium batteries which are inserted inside the blink mini camera. Moreover, the Blink camera is environmental, it can withstand any kind of season whether it’s a sunny day or rainy day. The setup is super easy just plug in the Blink camera and connect to the wifi connection.
On the other hand, the Lorex security camera can record video in 1080p HD quality with the latest technology. It is best for smart home monitoring activities. It can work in outdoor and indoor areas very well. Moreover, the camera is ideal for business purposes. You can keep an eye on your employees, inventories, and the safety of the customers. The Lorex security camera installation keeps you connected where you can’t even present physically.
Setup of the Blink Camera for Home Security Surveillance
The Blink Mini camera is best for home security surveillance. It is designed in such a way so you can set up this camera within minutes. Besides, it does not take any long wire for the installation of the camera or you don’t have to be tech-savvy. Just plug the camera into the wall outlet and connect to the available wifi connection and you are done. But still, it requires adequate knowledge for the setup of the camera.
Requirement for the setup of the camera
For the setup of the Blink camera, you need a wireless internet connection. Your wifi connection should have 2.4 GHz of frequency band with 2 Mbps of speed
Install or download the Camera app
Open the play store on your Android or Apple mobile device and search for the Blink app. After downloading the app and following the app instructions. After that create your Blink app account. When you open the app, you need to click on the Blink logo to begin the setup process. After that add on a system button. Later you need to tell your app for which purpose you are using this camera, like for home or for business purposes. After that click on the sync module option and the page appears on your mobile screen in which it provides you the basic instructions for the camera.
Setup of the Blink camera
Now plug in the sync module into the power outlet and wait for at least twenty seconds until the camera starts blinking the LED solid green light. It indicates that the camera is successfully connected with the app. After that leave the app for a few seconds and go to the mobile settings and find the wifi connection. In which you have to connect your camera with the mobile wireless connection. Now drive back to the blink app and tap on the available wifi connection in the settings of the mobile device. Now enter the relevant password for the security measures and tap on the Done button. In case the blink mini camera won’t connect to the wifi then you can ask the support team of the camera for help.
Setup of the Lorex Camera Home Security Surveillance
For the setup of the Lorex camera, you need to go through some basic points that will guide you in detail. So that you won’t get into any kind of trouble. The installation of the Lorex camera requires long hard wires and it is suitable for business use.
Connect the Lorex camera
First of all, you need to connect the Lorex camera with the port on the rear panel of the device. Push the button to connect to the camera. After that connect the USB mouse to the USB port of the rear panel of the device. And then connect the Ethernet cable to the ethernet port of the rear panel. The one end of the cable in the device and the other end is in the router for a stable wifi network. After that connect the device with the display system so you can keep an eye on or monitor all the activities in your working area.
Now connect the device with the power adapter. Insert the adapter into the power wall and then check that the device is working or not. Before it is mounted to a permanent location, Power on the camera to check the video quality of the camera and its working condition. You can also set up the date and time. So it can provide accurate details with accurate timings.
Set a Unique password
Once the installation of the camera is done. Now you have to create an account. If you are using the Lorex camera for the first time then the password and username are provided by the company. The username is admin and the password is none or it can be 0000.
Final words
The Blink mini camera’s setup is convenient and can be done in a few minutes. For the setup of the Blink camera, you don’t need any technical support but for the Lorex camera installation, it requires technical support. Because it is not handy and requires long secured wires that a non-tech-savvy person can do. Whereas the Blink camera can be operated with the help of the Blink app but on the other side the Lorex camera requires a display system and proper monitoring for checking the activities of every movement.