Sanding is one of the most common woodworking tasks. It’s also one of the most dangerous. Using power tools to sand can be especially risky, but even hand sanding can lead to accidents if you’re not careful. To avoid injury or damage, use these sanding safety tips to keep your projects safe and smooth:
Always wear safety goggles
Among the sanding safety tips, this is the most important. You should always wear safety goggles while sanding. Sanding generates a lot of dust and other debris, so you’ll want to protect your eyes from this stuff. Make sure your safety goggles fit properly otherwise, they won’t be effective in protecting your eyes.
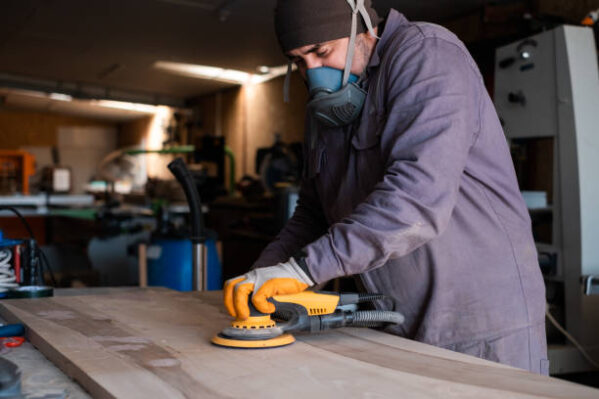
Wear a mask if dust is in the air
Another sanding safety tip, wear a mask. It should have a NIOSH rating of N95 or higher. Use the mask when sanding to avoid breathing in dust from wood, drywall, fiberglass, and more.
Dust masks are not effective against all types of dust. For example, silica-containing materials such as concrete and masonry products can cause silicosis if inhaled regularly over time.
To protect yourself from these materials, wear respiratory protection (a NIOSH-approved HEPA respirator equipped with an organic vapor cartridge) when working with drywall or other similar building materials which may contain asbestos fibers.
If you don’t have a respirator available, use water mist as an alternative to reduce exposure to airborne particles while working with drywall or other similar building materials which may contain asbestos fibers.
Use a dust collector to minimize dust
Dust is your enemy. It’s pretty much the worst thing you can breathe in, and it’s a lot easier to get in your lungs than you might think. When you’re sanding, it will be all around you; in the air, on the floor, and even in your mouth if you don’t keep your mouth closed while sanding.
If you have a way to suck up that dust and keep it out of your lungs, DO IT! Otherwise, you could be in for some serious health problems down the road.
Use proper lighting
The best way to ensure that you abide by these sanding safety tips is to choose a proper light. If a light is too bright, it can strain your eyes and cause headaches. Sanding in the dark or dim lighting is also difficult because it may be hard to see where you are working.
A good quality lamp with a shade directing the light where you are working will make an enormous difference when it comes to working safely and efficiently on your project.
Don’t sand too deep in one spot
When you are sanding, it’s easy to get carried away and keep going over the same spot again and again. This will leave your piece looking dull and muddy, instead of the sleek, shiny finish you’re aiming for.
Keep track of how many times you’ve gone over each area by counting how many strokes it takes to cover the entire surface (and don’t count the first pass). Once you’ve reached that number, move on to another section of your piece before going back to that area again.
Change your sanding belt often to keep it cutting smoothly and properly
Sanding belts are essential to the process of sanding, and you should change them regularly. As one of the newer belts will cut cleaner than the old ones. Worn-out belts will leave scratches and become dull more quickly than new ones, so it’s best to keep a stock of several different grits on hand to ensure that you have a good one for the job at hand.
Also, remember that not all sanding belts are created equal—some might be too small for your needs or not suited for certain surfaces.
Use the right grit for the job
Before you begin sanding, it’s relevant to know the different types of sandpaper available and what each is best for. Sandpaper comes in a variety of grit sizes. The smaller the number on your paper, the finer it will be. If you have a finer grade than needed, you can use it to quickly remove large amounts of material or create finer finishes as well as removing large amounts of material faster.
For example, 150 grit would be used on softwoods like pine, while 400 grit would be used on hardwoods like oak and maple since they have more wood fibers that need to be removed by sanding away at them until they are smooth enough for your project needs.
Clean up carefully after sanding
Clean up after you’ve finished the job. If you’re using a vacuum, only use it in an area with plenty of air circulation and not directly on your skin to conform with sanding safety tips.
If you have any other dust collection methods, make sure to use them too.
Afterward, wipe down the work area with a damp cloth or mop to clean up all the fine grit that may have fallen onto the floor during sanding.
Last but not least on sanding safety tips: Do not use any of the following materials:
- Food prep surfaces. The oil and grease in your skin can cause the sandpaper to clog up, which will make it ineffective at smoothing out a surface.
- Lead paint. When sanding lead-painted surfaces, you’ll want to wear a respirator and goggles, as well as gloves that are specifically made for lead abatement.
- Plastics, paper-covered wallboard, and veneers. These have very thin coats of finish on them that can be easily removed by an orbital sander. If you need to remove these materials from something (like a piece of furniture), you should use a hand tool such as an old-fashioned cabinet scraper instead so that you don’t damage those thin layers underneath them!
Post-Sanding Safety Tips
As you can see, there are many things to consider when sanding. From safety and efficiency to the right tool for the job, many factors go into sanding correctly.
By following these sanding safety tips, along with good judgment about what materials you’re working on and how much pressure has been applied already (your intuition can help here), you should be able to safely and effectively achieve your goals in any project.