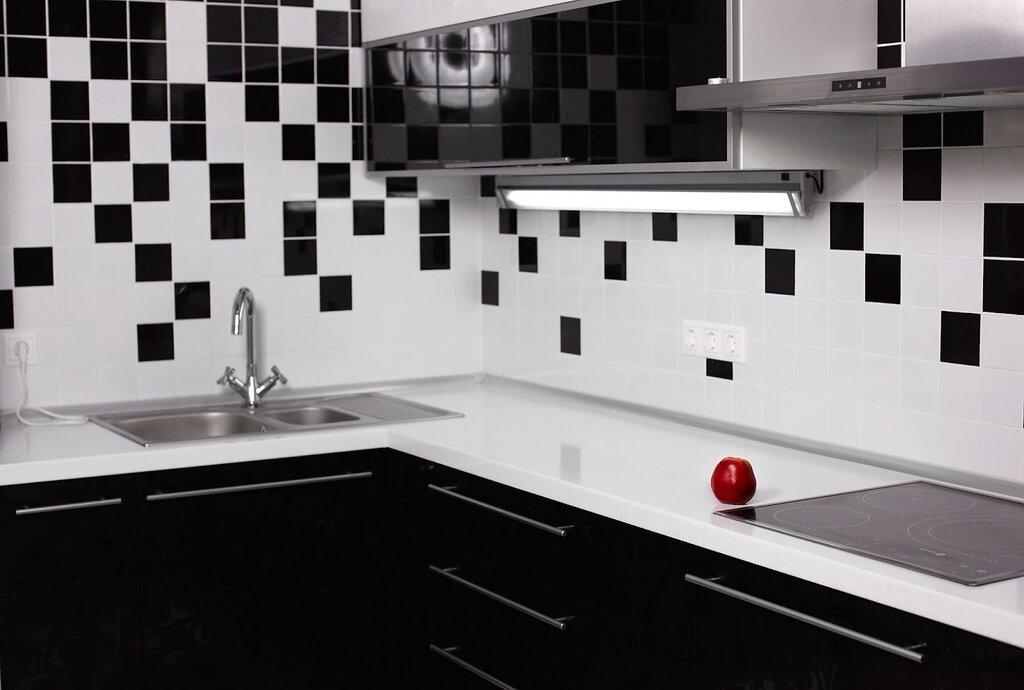
We thought of the time when the installer finished. Those brand-new, white, glowing tiles.
Some months down the corridor, and bang. Dull gray grout, and some unknown, baffling films seem to sprinkle themselves everywhere, popping out of the blue of some distant horror movie.
What no one unknowingly tells you is that keeping those subway tiles relatively stain-free is not some exhausting routine of deep-clean scrubbing marathons.
It’s almost like a strategy. It’s almost like a system. There is something many kitchen managers have learned the hard way and perhaps something that explains the phenomenon of kitchen grime like no other: it is deep kitchen task lighting with a color temperature of 3-3.5K.
There are some practical daily moves, structural weekly restorations, and custom dying routines. What we refer to is something that can keep that retrospect shine in a backsplash without you having to sacrifice those lovely little weekend breaks from the daily routine of the weekdays.
Building Daily Habits That Actually Work
Think of cleaning your backsplash tiles like brushing your teeth. A couple minutes a day is much better than some extensive cleaning every couple weeks.
The Post-Cooking Wipe-Down That Changes Everything
Your secret weapon here is called timing. You want to clean your backsplash right after you’re done cooking while it’s still warm. Why? The heat from cooking will loosen any food particles or grease so they don’t stick to your tiles overnight.
Make sure to use a microfiber cleaning cloth. After you’re done cooking, take a cloth, dampen it, and swipe the tiles behind your stove and sink and any tiles that are done cooking. Don’t try to get every single splatter; the important thing is to make sure you stop any oil from sticking to the tile because that’s when real permanent stains set in.
Your Five-Minute Evening Reset
Busy kitchens need more than one pass. An evening touch-up sounds tedious until you realize it takes less time than scrolling through social media.
Fill a spray bottle with warm water and add several drops of pH-neutral dish soap. Give your backsplash a light spray, then wipe using horizontal strokes with a clean microfiber cloth. Finish by drying with a separate cloth; this step is crucial for glossy tiles that broadcast every streak like a billboard.
Want to know what most people overlook? Switch out your cleaning cloths daily. Otherwise, you’re spreading yesterday’s bacteria across your “clean” tiles. Not exactly the goal.
Your Weekly Deep-Clean Strategy for Lasting Brilliance
Before you start scrubbing, understand this: proper tools trump brute force. Too many homeowners wreck their tiles with abrasive pads or acidic solutions that seem effective initially but slowly destroy the protective glaze. Professional installers stress selecting kitchen backsplash tile based on durability ratings, but after installation, gentle maintenance protects your investment for years.
The Deep Clean Process That Actually Protects Your Tiles
The first step is dry dusting with a cloth. This collects any dust particles that can scratch your tiles before you go in with a wet cleaning.
Make sure to apply your cleaner in sections top to bottom. Avoid leaving any on the surface to dry as that can create a sticky oxidation that can cause problems in the future. For the grout lines, stick to a soft bristle toothbrush with careful rotational motions. Don’t go too hard on the scrubbed surface as you can deteriorate the grout. Once done with the cleaning, make sure you use a separate cloth to rinse with clean water. Dirty soap is a magnet for everything you just cleaned.
Natural Solutions That Don’t Wreck Your Finish
The chemicals you usually find in the store near the tiles aren’t necessary. Your subway tiles on your backsplash will look just as good with a paste made of baking soda and water.
In most cases, a mixture of water and dish soap will suffice for your day-to-day cleaning. For built-up grease, just add a corn starch to the mixture and it’ll help break down the oil with ease. If you’re near a sink, hydrogen peroxide is good for the black mold you can accumulate in some spots. Just make sure to test a grout sample somewhere as colored grout can look blurry.
Grout Care: Your Backsplash’s Make-or-Break Element
Neglected grout makes even the cleanest tiles look unkempt. Even if the rest of your tiles are spotless, visitors will still see grout, which will affect their perception of tile and grout being “well maintained.”
Monthly Grout Attention That Pays Off
Since grout is porous, it absorbs staining materials quicker than tiles do, therefore, it requires more attention. A grout brush with angled bristles is perfect for the wrist-saving tile-slots cleaning.
It’s time to start in the areas with the most potential for staining. Your sink and stove are most at risk as they are high moisture and grease areas. If the grout is aged and white, a paste made of hydrogen peroxide and baking soda is a useful and effective cleaning so just rub in and let it sit for about ten minutes before giving it a scrub. Professionals will let you know that the absolute best tile is porcelain with water absorption of <0.5%. This is much better for tile and grout upkeep as it is more effective for resisting oil than other porous tiles with the opposite characteristic.
It is totally unrealistic to expect to do the work of several months of neglect in tackling an unmaintained old grout line in one go. It is best to do a bunch of light scrubs to avoid damaging the grout too much, as at that point, it would just be a one aggressive scrub damaging the whole grout line.
The Sealing Process That Prevents Problems
To ensure that your grout stays protected after extensive shampooing, you will need to seal the grout lines. One great way to determine if your grout lines need to be sealed again is to place a water droplet on your grout lines. If the water is absorbed into the grout within a few minutes, it is time to seal the grout.
To ensure that your grout sealant gets into grout lines, use a small paint brush or hole tipped applicator, and be sure to keep it off the actual tile. After you apply the sealant, it will need to dry for a full 24-48 hours to be effective. After, you are done cooking, be prepared to wait a full 24 hours until you are able to use the area again. Every 6-12 months you must repeat this process, and doing this every few months will help keep protective seal on your grout lines.
By sealing grout lines, you will be able to stop stains before they get absorbed into the grout, which will be able to relieve time spent cleaning
Cleaning Subway Tile Based on Surface Finish
Different finishes require different handling. What looks stunning on glossy tiles can ruin matte surfaces, and the reverse is equally true.
Glossy Tile Maintenance
Subway tile backsplash care and maintenance for glossy finishes centers on eliminating streaks and water spots. These reflective surfaces highlight every cleaning imperfection.
Use a squeegee after washing to remove excess moisture. Buff with a dry microfiber cloth using circular movements for a streak-free result. Notice cloudy film building up? That’s typically soap residue; switch to a glossy-tile-specific cleaner or dilute your current solution further.
Matte Surface Care
Matte and textured subway tiles hide water spots better but trap grime within their surface texture. You’ll need a little firmer scrubbing, but a shine-enhancing product is best to avoid. It’ll change the finish you specifically chose.
Incorporate the cleaning solution to textured surfaces using a soft-bristle brush. Rinse thoroughly to remove residue, especially on matte surfaces, as leftover cleaning product will be difficult to see. These tiles forgive minor daily maintenance oversights but need to be cleaned thoroughly to remove the deep-embedded dirt.
Solving Common Backsplash Challenges
Even with flawless routines, certain issues emerge. Understanding how to clean subway tile backsplash problems efficiently saves time and prevents unnecessary damage.
Dealing with Stubborn Grease
For thick grease buildup around stovetops, you’ll need to get a degreaser, but you need to get a tile-safe one. Spray it, let it sit for the amount of time the manufacturer suggests, and wipe it off with warm water.
For prevention, you can get a temporary splatter screen to use for the high-heat cooking you may be doing. You could also check to see if your range hood captures grease. A lot of people think they’re running it correctly, but use settings that are too low for it to work properly.
Hard Water Stain Removal
White, chalky mineral deposits from hard water commonly appear near sinks. A citric acid solution (safe for sealed grout) dissolves these mineral buildups effectively.
Combine one tablespoon of citric acid powder with two cups of water. Spray affected zones, wait five minutes, then wipe clean. Persistent stains might require repeated applications. If hard water creates constant battles, installing a water softener addresses the root cause rather than the symptoms.
Protecting Your Investment Long-Term
There are also white, chalky, and mineral deposits that sit around sinks called hard water stains. You can get a solution made from citric acid that works perfectly and is also safe for your sealed grout that is around the tile.
For the recipe, mix 1 tbsp citric acid powder with 2 cups of water. From there, you can spray the area and let it sit for 5 min, then wipe it away. It may take a few tries if they’re pretty tough stains. If you’re battling hard water a lot, it may be worth it to get a water softener that addresses the root cause instead of tackling the symptoms.
Common Backsplash Maintenance Questions
How often do you need to seal the grout on your subway tile backsplash?
Every 6 to 12 months, depending on the use of your kitchen. Take a water droplet and place it on your grout, if the water disappears quickly it’s time to reseal. If your kitchen is a high traffic kitchen then you will need to seal the grout more often to protect against stains.
Is there any truth to the hysteria on the internet about vinegar damaging my backsplash?
Yes, vinegar does etch sealed grout, it is not as natural as it seems. It is fine to use vinegar occasionally on unsealed surfaces, it is better to use pH neutral cleaners for grout on a more regular basis. It’s the acidity that breaks down the grout sealer and makes it more necessary to seal more often.
How to get the fastest grout cleaning without a marathon of scrubbing?
Use a paste of baking soda and hydrogen peroxide let it sit for 10-15 min then scrub with an angled brush. You can also use steam cleaners on grout to quickly sanitize without using any chemicals. After cleaning, being able to spell and quickly cleaning up will significantly reduce the need for more scrubbing.