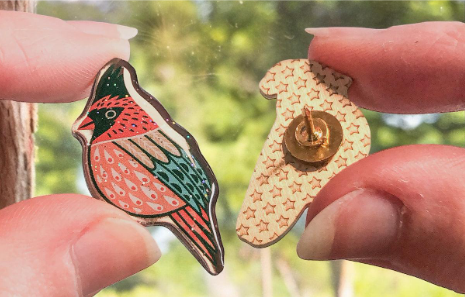
Enamel pins are small but are the most intricate decorative item in Gen Z fashion. They easily get attached to clothing, bags and accessories. Perhaps this is the reason – their versatility, which is why people are head over heels in love with them.
However, not everybody can make them. It takes creativity, precision and understanding of design to craft these tiny masterpieces. They go from conceptualizing unique ideas to carefully bringing them in a tangible form. Also, the process involves taking help from some efficient digital tools.
So, if you want to learn the secret of designing the perfect pieces, then read this blog. It has everything from concept and design to material and manufacturing.
Designing Perfect Enamel Pins in Seven Steps
You will often see these attachments carrying messages that are powerful and heavier than their own weight. This is because people use Enamel Pins to express their beliefs, support causes and showcase their unique personalities.
People also enjoy turning their simple accessories and garments into a much-loved fashion statement. So, we can say that the pins are a great way of resonating deeply with personalities and communities.
In recent years, they have emerged in the limelight again, thanks to social media, the collector community and fashion trends. Everyone, teenagers, children and young adults, is after them, but little do they know, they don’t have to spend a hundred dollars to get one. They can simply learn a few things and design their own masterpiece.
1. Imagine & Brainstorm
Your first move should be to gather inspiration for your enamel pin design. Start with the evaluation of your interests, hobbies and current trends. You can look around for the latest
movies, songs, and book releases. Then, brainstorm the ideas and themes that resonate with you or your target audience.
Once you get a vague image in your mind of what you want to see on your pin, begin sketching it out. This can be a tiring and exhaustive process as you will have to create and erase a dozen times but believe us, a rough sketch and notes are necessary.
2. Doodle It Out
Now that your creative juices are flowing already explore different possibilities and think out of the box as much as you can. You can even try coming up with unique and never-done-before ideas to create an inimitable design. Then, turn your ideas into a final sketch.
During this practice, focus on the main features and online of your pattern. Try to keep it very simple, but do not miss out on the details as a whole. They are equally important. So, as you doddle it out, you can experiment with different shapes, lines, elements and layouts.
3. Choose Vibrant Colours
Congratulations! You are halfway there. Now, your next step is to select colours that complement each other and make your design stand out. Hence, you need to use the correct colour theory and create harmonious combinations, which are also attention-grabbing.
Then, considering the limitations of enamel colours, you must choose hues that can be accurately reproduced. For example, you can opt for a few primary colours to keep the design bold, clear and appealing for the potential viewers.
4. Go Digital
Going digital means you transform the design and send it to the screen. Of course, not through the scanner, which means you have to recreate it with software and tools on the computer. This practice allows for precise and scalable designs. So, never think of omitting this step. It also lets you ensure a high-quality production with zero flaws.
You can use digital design tools like Adobe Illustrator or CorelDRAW to refine and perfect your sketches. These tools offer precision and scalability to ensure that the design you create looks great at any size. Moreover, you need to convert your sketches into vector graphics and save them in high-resolution formats.
5. Make a Prototype
A prototype is an initial sample or model created to test and evaluate a design before final production takes place. It is an effortless way of seeing your design in a form similar to the real-life experience. It is just that you cannot touch it, but you can visually inspect and assess it.
Prototyping helps identify any flaws or areas that need improvement. Therefore, it is a valuable step and cannot be missed. It ensures that the final product meets the expectations of the client. You can assess the colour accuracy, enamel fill and overall quality at this point.
6. Conduct Quality Checks
Nothing ever goes into the production equipment without the necessary quality assurance tests and the final confirmation. Hence, the same is the case with enamel pins. Before you send it to the production line, you must conduct thorough quality checks on the prototype.
After that, look for issues such as colour mismatches, uneven enamel fill, and attachment problems. In addition to that, make necessary adjustments to perfect the design and ensure the quality, too.
7. Finalize and Manufacture
All of these checks are important to make sure that the enamel pin not only looks great but also lasts longer. Hence, once you are satisfied with the prototype, move to the next step. You must choose a reputable manufacturer specializing in enamel pins.
Provide clear specifications to him and communicate effectively to avoid misunderstandings. Apart from that, you must again make sure that the final products are consistent in quality throughout – you know, the final touches. Then, patiently wait for the pin to come out of the digital equipment fresh and crisp.
Common Pitfalls to Avoid When Designing
- Do not overcomplicate the design by adding too many details
- Never take too lightly the market research process if you want your pins to sell well
- Stop making poor colour choices and lowering the appeal of the design
- Do not use inconsistent themes as it destroys the clarity
- Do not neglect functionality. Without it, your designs are poor and useless
- Avoid skipping the prototyping phase. It catches and corrects design mistakes
The Final Words on Designing Enamel Pins
The making process is an exciting and rewarding journey which allows you to express creativity and individuality. Imagine going from brainstorming unique ideas to perfecting the final product, and how satisfying it gets.
However, this satisfaction comes with a price. The designer has to be very attentive to the details and make sure the size and dimensions are error-proof. Moreover, with the right approach, anyone can create these tiny works of art. So, start exploring your ideas today and bring those designs to life using this systematic guide.