In today’s fast-paced digital world, effective email management is crucial for productivity and organization. Microsoft Outlook, a leading email client, offers powerful tools to help users manage their email flow efficiently. One such tool is the ability to set up archive rules, which can automate the process of organizing and storing emails based on predefined criteria. This article will guide you through the steps to set up archive rules in Outlook, empowering you to take control of your inbox and streamline your email management workflow.
Understanding Archive Rules
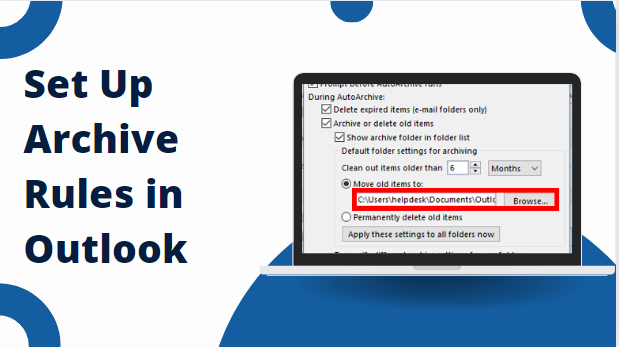
Archive rules in Outlook allow you to automatically move emails from your inbox to specific folders based on conditions you set. This can be particularly useful for managing large volumes of email and ensuring that important messages are easily accessible while keeping your inbox clutter-free.
Common reasons to use archive rules include:
- Organizing by Sender: Automatically move emails from specific senders or domains to designated folders.
- Sorting by Subject: Archive emails with specific keywords or subjects into appropriate folders.
- Time-Based Archiving: Move older emails to archive folders based on their age, helping to maintain a manageable inbox size.
By setting up these rules, you can reduce the time spent manually sorting through emails and focus more on critical tasks.
Step-by-Step Guide to Set Up Archive Rules in Outlook
Setting up archive rules in Outlook is a straightforward process. Follow these steps to create and manage your archive rules effectively:
Step 1: Launch Microsoft Outlook
Ensure that you have Microsoft Outlook installed and open on your computer. Navigate to your inbox or the folder where you want to set up the archive rules.
Step 2: Access Rules and Alerts
- Click on “File”: Locate and click on the “File” tab in the upper-left corner of the Outlook window.
- Open “Manage Rules & Alerts”: In the Info category, click on “Manage Rules & Alerts” under the Account Information section. This will open the Rules and Alerts dialog box.
Step 3: Create a New Rule to Set up Archive Rules in Outlook
- In the Rules and Alerts dialog box, click on “New Rule…” This will open the Rules Wizard, which will guide you through the process of creating a new rule.
- Choose this option to specify that the rule should apply to incoming emails.
- Outlook allows you to set conditions based on various criteria such as sender, subject, recipient, and more. Choose the conditions that best suit your needs.
- Select “Move the item to folder” as the action for the rule. Click on “specified” in the rule description box, and then select or create the folder where you want the emails to be archived.
- If there are specific circumstances where you do not want the rule to apply, you can add exceptions. For example, you might exclude emails marked as important or from certain senders.
- Give your rule a descriptive name that reflects its purpose, making it easier to manage multiple rules later.
Step 4: Test and Apply the Rule to Set up Archive Rules in Outlook
- Before finalizing, you can run the rule to see how it will affect your emails. Outlook will show you which emails would be affected by the rule based on your current inbox.
- Once you are satisfied with the rule settings, click “Finish” to apply the rule. You will be returned to the Rules and Alerts dialog box.
- In the Rules and Alerts dialog box, you can review all your existing rules, including the new one you just created. From here, you can modify, delete, or create additional rules as needed.
Best Practices for Using Archive Rules
After the “set up archive rules in Outlook” task is completed, consider the following best practices for effectiveness:
- Create rules that are straightforward and target specific types of emails. Overly complex rules can be difficult to manage and troubleshoot.
- Periodically review and update your rules to ensure they remain relevant to your current email management needs.
- If your archive rules automatically delete emails from your inbox, ensure that important communications are backed up or retained elsewhere.
- Before applying new rules to your entire inbox, test them with a small subset of emails to ensure they work as expected without unintended consequences.
- If you are setting up rules for a team or organization, guide best practices and ensure everyone understands how the rules will impact their email management.
Are there Any Limitations to Set up Archive Rules in Outlook?
By following the above steps one can set up the archive rules in Outlook 365. Still, sometimes users faced some hurdles during the task:
- Delayed access to archived data impacts workflow efficiency and user productivity.
- Limited search capabilities make finding specific archived items challenging for users.
- Users may face constraints on data storage limits and management.
- Concerns arise over data integrity, accessibility, and protection against unauthorized access.
- Integration issues hinder seamless access to archived data across different platforms.
- Strict policies may lead to prematurely deleting critical data if not managed carefully.
- Meeting regulatory standards requires careful management of archived data access and retention.
To Address any Consequences, Organizations can Consider –
The major reason is to not depend on archive or retention policies i.e. after completing the archiving or retention period, you cannot access the content. So, it is better to consider the backup option using the SysTools Office 365 Backup Tool. With this solution, you can copy your cloud data in your local drive. To understand its efficiency, you can try it for free.
Despite that, there are several features provided by this utility to make the backup task a breeze i.e.
- Save Outlook 365 data locally for secure access without the internet.
- Secure data from O365 shared mailboxes by downloading to your system
- Backup Office 365 in-place archive mailboxes effortlessly.
- Selectively backup Office 365 mailboxes by date range.
- Admin-enabled bulk download for Office 365 Outlook mailboxes.
- Efficient delta backup to save only new data in mailboxes.
- Ensure data security with encryption during storage and transfer.
Bottom Lines!
Setting up archive rules in Outlook can significantly enhance your email management efficiency by automating the process of organizing and storing emails. By following the steps outlined in this article to set up archive rules in Outlook and adhering to best practices, you can create a more streamlined workflow, reduce inbox clutter, and ensure that important messages are always within reach. Take control of your email today with Outlook’s powerful archive rules and experience a more productive workday.