In the world of 4WDing and heavy machinery operation, there is a moment of silence that happens right after a truck sinks into the mud. The engine revs, the wheels spin, and the vehicle settles onto its chassis. You are bogged.
What happens next separates the professionals from the liability headlines.
If you are reading this, you probably know that a snatch recovery is the most effective way to extract a bogged vehicle. But it is also the most dangerous. You are essentially creating a giant slingshot with tonnes of kinetic energy loaded into the system. If a strap snaps or a mounting point fails, the recoil speed can exceed 400km/h.
This isn’t about giving it a “yank” and hoping for the best. This is about physics, preparation, and procedure. Whether you are recovering a Hilux on Fraser Island or a tractor in the Wheatbelt, the rules of engagement remain the same.
Here is the definitive guide on how to use snatch straps correctly, safely, and effectively.
Step 1: The “Stuck” Assessment
Before you even open your recovery kit, stop. Turn the engines off. Get out and look.
The biggest mistake operators make is underestimating the load. A 3-tonne ute buried to its chassis does not weigh 3 tonnes anymore. The suction of the mud (mire resistance) can triple the effective weight.
Ask yourself three questions:
- How deep is it? (Hub height? Chassis height?)
- What is the gradient? (Are you pulling uphill?)
- What is the underbody caught on? (Is there a different pumpkin acting as an anchor?)
If the vehicle is “bottomed out,” you need to break out the long-handled shovel. You must clear the mud from in front of the wheels and differentials. If you skip this step, you aren’t fighting the weight of the truck; you are fighting the earth itself. No strap on the planet will save you if you are trying to pull a plow through concrete-hard clay.
Step 2: Selecting the Right Gear
Do not grab the first strap you see. You must match the strap to the lightest vehicle in the recovery equation.
This sounds counter-intuitive. Most people think, “I’m stuck, I want the strongest strap possible.” Wrong.
A snatch strap works by stretching (up to 20-30%). If you use a 30-tonne mining strap to recover a Suzuki Jimny, the Suzuki doesn’t have enough mass to stretch the strap. The strap won’t elongate. It will act like a steel chain. You lose the kinetic advantage and introduce a massive shock load that can tear the front off the car.
- Standard rule: The strap’s Minimum Breaking Strength (MBS) should be roughly 2x to 3x the Gross Vehicle Mass (GVM) of the lighter vehicle.
- Inspection: Run your hands along the entire length of the webbing. Look for cuts, nicks, or chemical burns. If the strap is frayed more than 10% on the edges, retire it. It’s not worth the risk.
Step 3: The Setup and Alignment
Position the recovery vehicle in line with the stuck vehicle. You want a straight pull.
Pulls that are angled (where the vehicles are not in a straight line) place enormous shear stress on recovery points and chassis rails. If you have to pull at an angle, you should be using a snatch block and winch, not a snatch strap.
The “Z” Layout:
Reverse the recovery vehicle until the vehicles are closer than the length of the strap. Connect the strap to both vehicles, leaving about 2-3 metres of slack. Lay this slack on the ground in a “Z” or “S” shape.
Why? This slack is your runway. It allows the recovery vehicle to accelerate and build momentum before the strap goes tight. That momentum is what stretches the nylon and generates the “pop” that breaks the mud suction.
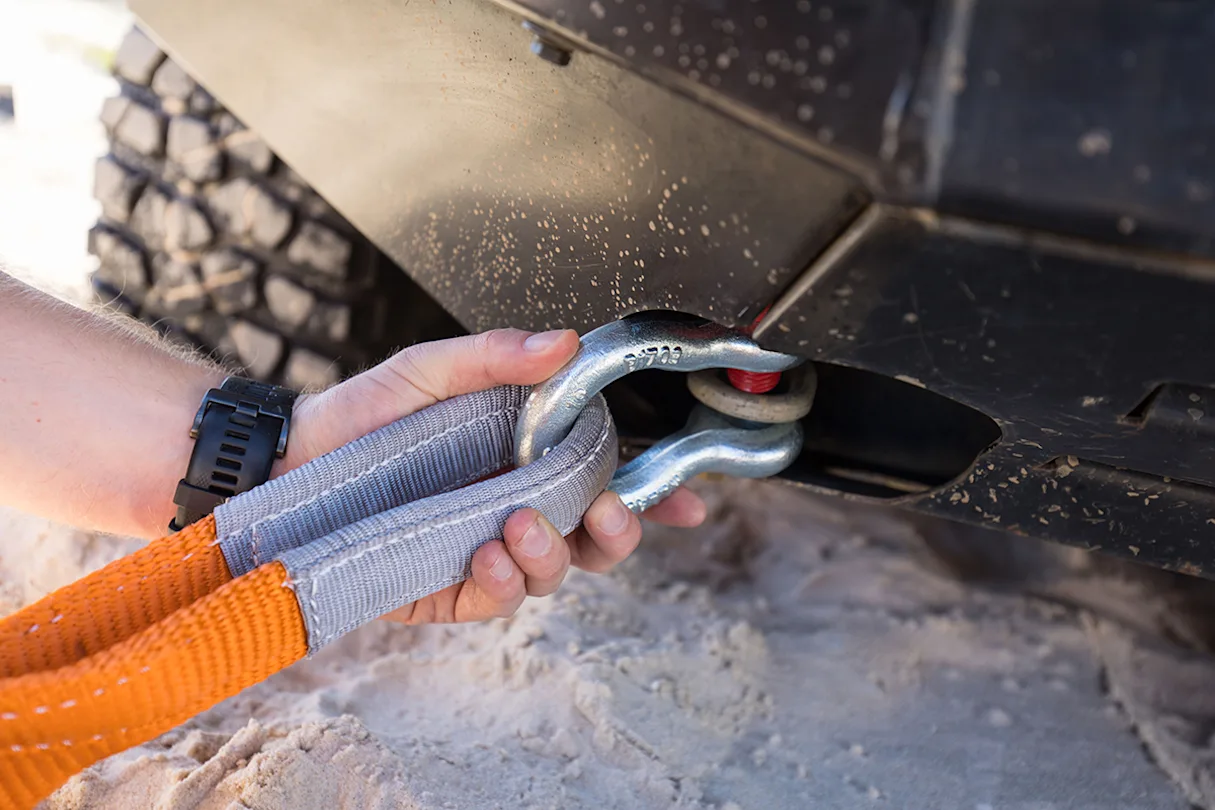
Step 4: The Connection Points (Critical Safety Warning)
This is where people die. You must only attach the strap to rated recovery points.
- The Bull Bar is NOT a recovery point. Unless it has specifically rated tow points welded to the chassis mounts.
- The Tie-Down Eyes are NOT recovery points. Those little loops under the bumper of your factory Ford or Toyota? They are for holding the car down on a shipping container. They will rip off like tin foil during a snatch recovery.
- The Tow Ball is NEVER a recovery point. This is the cardinal sin. A tow ball is designed for static downward pressure, not dynamic shear force. Snatch straps can snap tow balls clean off, turning them into lethal cannonballs.
Shackles: Steel vs. Soft
If you are still using steel bow shackles, ensure they are rated (look for the “WLL” stamp on the body). Tighten the pin fully, then back it off a quarter turn. This prevents the pin from seizing under load.
However, modern best practice is to use Soft Shackles (made from UHMWPE rope). They are stronger than steel and, crucially, lightweight. If something breaks, a soft shackle won’t kill you.
Step 5: The Dampener
You cannot skip this. A recovery dampener is a weighted bag (or a heavy blanket/jacket) draped over the middle of the strap.
Its job is simple physics: gravity. If the strap snaps or a shackle fails, the energy release will want to whip the strap through the air. The weight of the dampener forces the broken strap down into the dirt, rather than through your rear windscreen.
Place it in the middle third of the strap. It takes five seconds to do, and it is the cheapest insurance you will ever buy.
Step 6: The Communication
Radios are best. Hand signals are a backup. Shouting over diesel engines is useless.
Agree on the plan before you get in the cars.
- “Stop!” means stop immediately.
- “Go!” means start the pull.
Clear the area. Bystanders love to watch recoveries. They usually stand right in the “death zone” (a 45-degree angle from the connection points). Move everyone at least 1.5 times the strap length away.
Step 7: The Execution
Both drivers should be in gear.
- Stuck Vehicle: Low Range, 2nd Gear. (Why 2nd? 1st gear has too much torque and creates wheel spin. You want traction, not spin).
- Recovery Vehicle: Low Range, 2nd Gear.
The Driver’s Role (Recovery Vehicle):
- Take up the slack gently until you feel the weight.
- Communicate: “Ready?”
- Accelerate briskly (but not aggressively). You aren’t trying to break the land speed record; you are trying to stretch the band.
- As the strap tightens, keep the throttle steady. You will feel the vehicle slow down as the strap stretches—this is the energy building.
- Do not brake. Let the strap do the work.
The Driver’s Role (Stuck Vehicle):
- As soon as you feel the “pull,” accelerate. You need to help the strap.
- Keep your wheels straight. Turned wheels act like an anchor.
- Once you pop out of the hole, ease off the throttle to avoid ramming the recovery vehicle.
Step 8: The Failed Attempt
Sometimes, it doesn’t work. The strap stretches, the recovery vehicle stops dead, and the stuck vehicle doesn’t budge.
Do not: Reverse back and take a bigger, faster run-up. This is how you break chassis rails.
Do: Reset. Shovel more mud. Use traction boards (Maxtrax) under the wheels. Or, accept that you need a winch or a heavier machine.
A snatch strap has limits. If three attempts haven’t moved it, kinetic recovery is not the solution for this specific scenario.
Step 9: The Aftermath
Once the high-fives are done, inspect the gear immediately.
Kinetic straps generate heat. The internal fibers rub against each other during that massive stretch. If the strap is hot to the touch, let it cool down before rolling it up.
Clean your gear. Mud contains grit. Grit works its way into the weave and saws through the nylon fibers over time. Wash your straps in warm, soapy water (no harsh chemicals), rinse them, and hang them to dry in the shade. Never use a high-pressure washer directly on the webbing, as it can blast abrasive particles deep into the core.
Summary
Snatch recovery is a miracle tool when used correctly. It can retrieve a 10-tonne tractor with a 4-tonne pickup truck just by leveraging physics. But it demands respect.
Always rate your gear. Always use a dampener. And never, ever attach a kinetic strap to a tow ball. Stay safe out there.